 Apples, apples everywhere! It is another bountiful year for apples so I am trying new recipes, as well as my usual apple sauce, apple chutney and apple butter. I love apple pie (see my recipe for apple pie in my post titled “Fall Means Apple Pie”, October 20, 2015) but I wanted to try something a little easier than pie yet equally scrumptious. This Apple Galette is a great alternative to pie and makes a beautiful, rustic looking dessert that can be made while canning applesauce or doing your fall cleaning or taking a nap (well, maybe not the latter but you could relax while the crust is chilling :).
The crust is flaky but holds up well when sliced, sturdier than a regular pie crust. Some galette recipes call for using apricot jam on the dough before adding the apple mixture but I didn’t have any jam so skipped that step and don’t think it made much difference.
 RECIPE for APPLE GALETTE: (makes one 12″ galette)
For the crust: (I adapted several different recipes for this crust)
- 1 1/2 cups unbleached flour
- 1 TBSP sugar (optional)
- 1 tsp. cinnamon
- 1/2 teas. salt
- 1 large egg
- small amount of milk, half and half, cream or almond milk; or you can use about 1/3 cup cold water (I used almond milk and it worked great). The liquid is added to your egg to equal 1/3 cup.
- 1 stick of chilled unsalted butter
- 1/2 teas. grated lemon or orange zest (optional but adds a subtle bit of nice flavor to the dough)
- 2 teas. lemon or orange juice (optional)
Directions for Crust:
- In a food processor with a steel blade pulse the flour, salt and sugar a few times. Lightly beat the egg in a measuring cup and then add enough milk to equal 1/3 cup, mixing it together.
- Cut the chilled butter into small pieces and add to the process. Pulse until you get pea-sized pieces (do NOT over mix). You can also do this in a bowl and cut the butter in with a pastry cutter if you do not have a food processor.
- Drizzle egg/milk mixture over the dough and pulse again just until it starts to come together but is still crumbly. If using lemon or orange zest and juice add it now and pulse one or two more times.
- Place dough on floured surface and gently push together to make a circle. Flatten the dough circle into a flat disk with your floured hands and wrap with plastic wrap. Refrigerate for 2 hours or overnight.
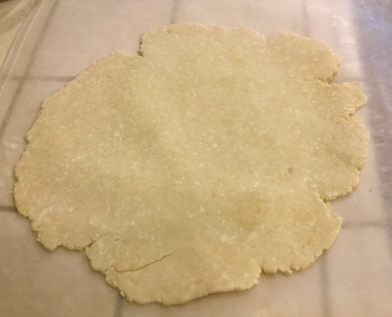
- When ready to make galette, remove dough from fridge, take off plastic wrap, flour lightly and roll into an approximately 12′ circle. No perfection needed here, one of the pluses of a galette, edges can be ragged.
- Place the dough onto a parchment-lined baking sheet and set aside while making the filling.
Ingredients for Filling:
- 2 lbs. baking apples – peeled and cored and thinly sliced – (approximately 6 -8 medium apples or 3 cups) – I used a mixture of an unknown variety of wild apples that had amazing flavor but any baking apple will work.
- 1/8 – 1/4 brown sugar (optional, depending on your sweet tooth!)
- 1 tsp ground ginger (optional)
- 2 TBSP maple syrup
- juice from 1/2 lemon
- 2- 3 TBSP cornstarch, depending on juiciness of apples – you can also use flour.
Directions for Apple Filling for the Galette:
- Preheat oven to 400 degrees.
- Toss the sliced apples with the lemon juice, sugar/maple syrup and cornstarch and pile the mixture onto the rolled out crust, leaving about 2 ” around edges.
- Carefully fold the edges over the filling, so it covers about 2 ” inches of the apple filling (see photo above). It does not need to be perfect by any means. “Pleating” the dough is helpful to keep it from unfolding.
- You can brush the pastry with any leftover cream/egg mixture and sprinkly with a little cinnamon and sugar if you like.
- Bake for about 20 minutes at 400 degrees then check to see if crust is getting too brown. You can place a piece of foil lightly over the galette to keep it from over-browning. Turn heat down to 375 and continue to bake another 14 – 20 minutes until apples are tender and crust is nicely brown.
- Remove from oven and, using a spatula, carefully slide the galette (still on the parchment paper) onto a wire rack. Cool for at least 30 minutes.
- Serve warm or if there is any left you can refrigerate it and it is a pretty darn great breakfast! You can add a dollop of whipped cream or cashew cream for a bit of extra decadence but it doesn’t really need any embellishment :).


